Simos Tools - Getting Set Up
What is Simos Tools?
Simos Tools is a free Android based app (developed by “Switchleg” from the forums) that requires a Maccina A0 dongle (or an SL1/ESP32 clone). You can purchase an A0 here:
https://www.sparkfun.com/products/17493
What makes Simos Tools better than other logging options is that it is specific to the MQB/MK7 platform. It has the ability to not just data log, but if you choose to do your own tuning, it can flash files as well - and it is FAST, under a minute for a calibration change. The logging has a very high resolution even without the high speed logging patch (more on that later) and can be used regardless of what ECU tune is on your car. It is able to do this by using ISOTP to BLE, and is why it requires a specific type of dongle.
If you want to look into it more, or join the Simos Tools Users on Facebook, check out the following link:
https://www.facebook.com/groups/926154161803291
Setting up the A0
Note all instructions are assuming a Windows 10 machine - I don’t know anything about Apple PCs.
1. You will need to do a few things first before the dongle is useable. Start by plugging it into your computer with a DATA cable. Not all micro USB to USB cords transmit data, many are power only. You will have problems with a non-data cable.
2. Moving on: You must install the appropriate drivers:
https://www.silabs.com/developers/usb-to-uart-bridge-vcp-drivers?tab=downloads
When you download the zip folder, you will need to EXTRACT it. When you extract it, you will need to RIGHT CLICK the silabser.inf file, and choose “INSTALL”.
After this is completed, your computer can now speak fluent dongle and it will show up in the COM port list. Use the search in the taskbar to look for “Device Manager”.
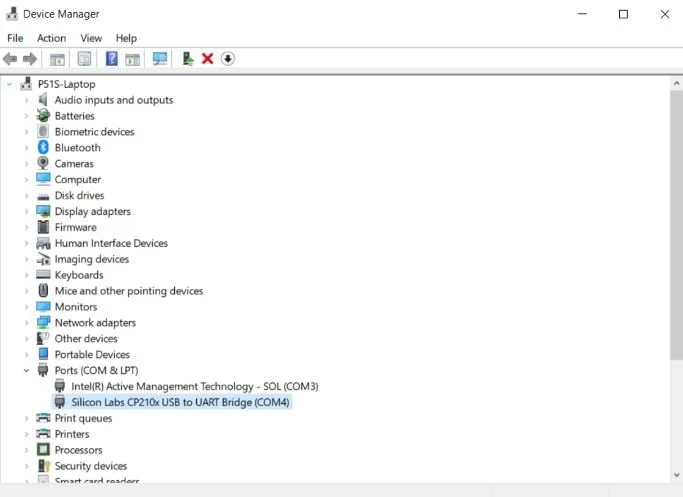
Take a mental note as to which COM port it is under! In this example it is COM4.

NOTE:
If it shows up under “Other Devices” and is not assigned to a COM port as a “Silicon Labs CP210x USB to UART Bridge”, there may have been an error with the driver install.
3. Now that our computer can actually speak to the dongle, it is time to update the dongle with the latest firmware.
Bookmark that link, because if there are ever any weird bugs with Simos Tools, it’s always suggested to start with checking firmware for updates.
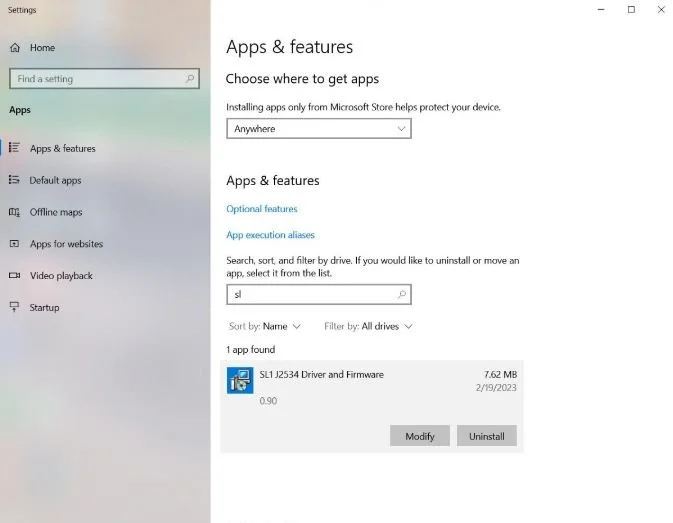
4. UNINSTALL OLD FIRMWARE FIRST (skip if dongle is brand new). To do this, you will open your Apps and Features, and search for “SL1”... Choose “uninstall”. (note: I already have 0.90 installed, this is just for example purposes. This is also where you can check to see which firmware version is installed).
Only required if updating previously flashed firmware on the device
Uninstall the SL1 J2534 Driver and Firmware
5. Now we can flash the new firmware to the unit. Run the .msi file downloaded above and a shortcut will be installed to your desktop. If this does NOT happen, check to make sure firmware is not pre-installed and/or that it was fully uninstalled as outlined in step 4.

6. Now you can run that Setup shortcut on your desktop (it will ask you to run as administrator, choose yes) and you will find this window:
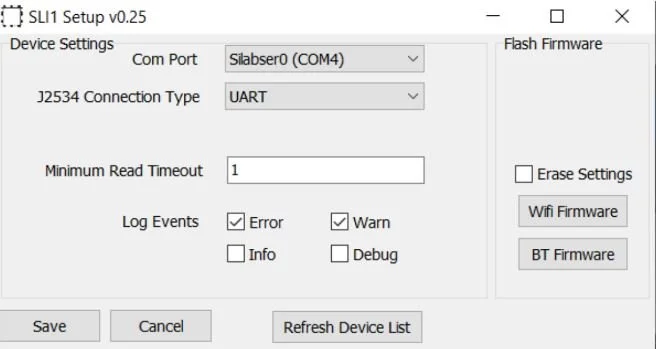
7. Now you are ready to firm up that dong! Make sure the correct COM port is selected where you device is plugged in first.
Note: If you have an ESP32 clone or SL1 instead of an A0, then go ahead and insert a paper clip into the hole and HOLD THE BUTTON DOWN of your SL1 dongle *while* you press “BT Firmware” in the above setup program. Otherwise just press the “BT Firmware” button.
8. The following screen should pop up pretty quickly and count up from 0-100%. If you have a dongle with a button, you can release the button once it starts counting up:
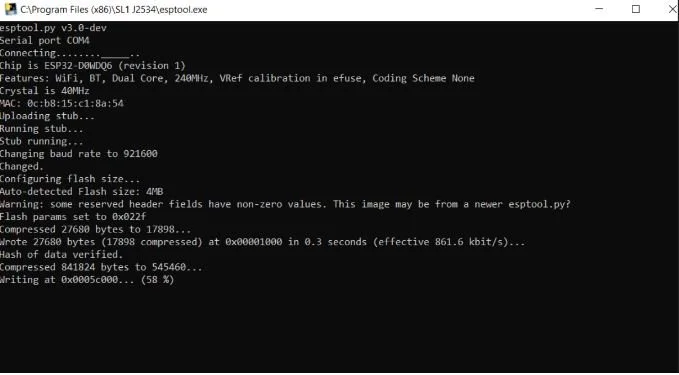
This window will flash through some stuff pretty quickly and then self close.
TROUBLESHOOTING: if this window doesn’t pop up, or you never see the percentage counting up:
Make sure you have a data cable. Then make sure again.
Make sure you have the CP210x driver installed first
Try ALL the steps above from the beginning one more time.
Panic and message Switchleg
9. Confirmation: As we sort of did before during the uninstall of the old firmware, we can go to “Apps and features”, search for “SL1”, click on “SL1 J2534 driver and firmware” to confirm which version it has been updated to. In this case it is 0.90 so we are good to go.
10. Extra hint: Keep your stuff organized in the event you ever need to flash back to an earlier firmware version... I have a dedicated Simos Tools folder and inside of it, a dedicated Dongle Firmware folder with the raw install files backed up in case I ever need them again. Plus this write up because I forget how to do this every single time (this article was mostly written so I could stop bothering Switchleg for help so he can continue with the big brain stuff).
Connecting Simos Tools to the Car
So now that we’ve got the dongle sorted out, we can actually use it to connect to the car. If you haven’t already, download Simos Tools from the Google Play Store on your Android device. It will ask if you want to allow access to location services: YES. If not, the app will not work. This has to do with BLE authorization or some such per country, without it the dongle will not be able to connect to the device.
For the remaining basic overview, I figured a video would be best to go over very basic features to get your feet wet and started logging.